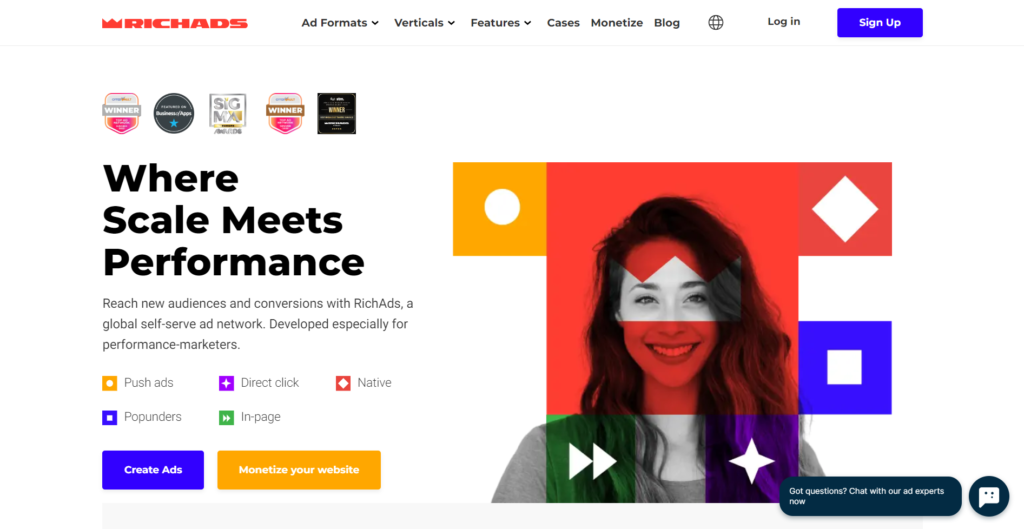
Finding a good offer is only half the battle for an affiliate. You also need to consider where to promote it. This problem can be solved by advertising networks — an intermediary between advertisers and publishers who are ready to place ads on their resources. Today, let’s look at the popular advertising network RichAds.
- What you need to know about RichAds
- How to register with the RichAds advertising network
- Overview of the advertising network’s personal account
- Campaigns
- Reports
- Billing History
- Tracking
- Insights
- Settings
- Profile
- How to start making money with RichAds
- How to top up your account in the ad network
- Reviews about RichAds
- Conclusion
What you need to know about RichAds
RichAds is an advertising network that has been in the market since 2018. The company operates with formats such as push, pops, domain redirect, and native ads. RichAds allows for worldwide traffic monetization and offers automated optimization. Payment models in RichAds include CPC and CPM.
It’s a good option to drive RichAds’ traffic to iGaming offers, and such traffic is accepted in MostBet Partners, for instance, which we have recently reviewed.
Advantages of RichAds include:
- Over 5 billion ad impressions per day.
- Various pricing plans, including custom options.
- Coverage of more than 220 geos.
- Various payment methods including cards, bank transfers, Capitalist, and cryptocurrencies.
- Proprietary DNS servers for enhanced ad delivery.
- Tools for automatic optimization, such as Target CPA, Automated Rules, and Micro Bidding.
Further benefits can be explored through direct collaboration, but initial registration is required to start working with RichAds.
How to register with the RichAds advertising network
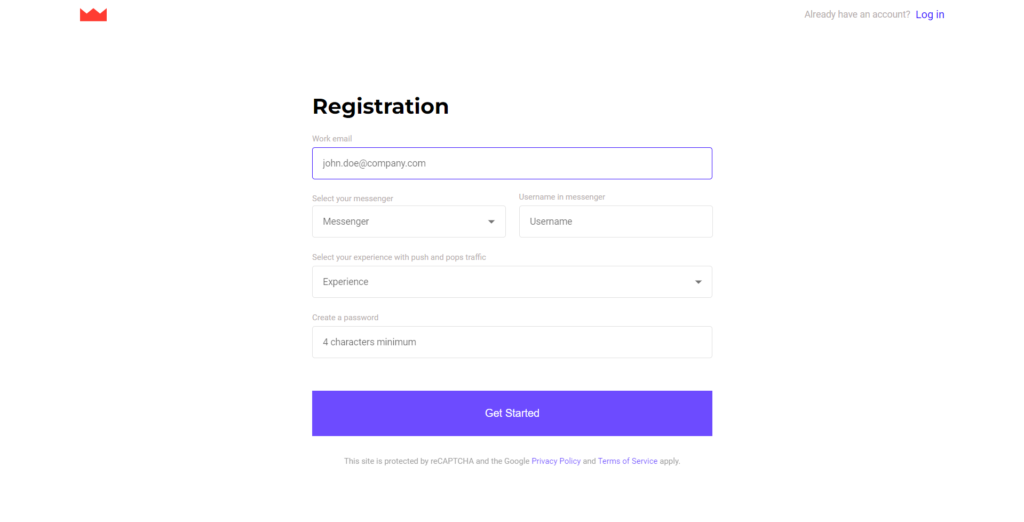
To register, visit the official RichAds website and click on “Sign up” in the top right corner of the screen.
Fill out the registration form with:
- Email;
- Skype/Telegram/WhatsApp/LinkedIn;
- Experience with pops traffic;
- Password.
Click on “Get started” and proceed to set up your account. Enter:
- First name;
- Last name;
- Country of residence;
- Account type: individual or corporate;
- How did you hear about the network.
Once done, you can start exploring your personal dashboard.
Overview of the advertising network’s personal account
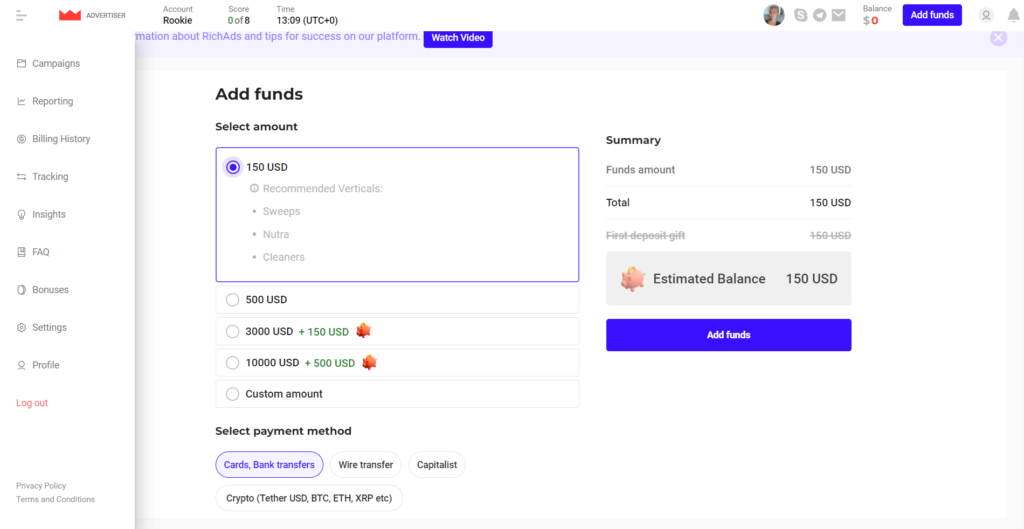
After registering, the personal account opens on the tariffs page:
- $150 — recommended for sweeps, nutra, and cleaners.
- $500 — for dating, streaming, betting, and gambling. Includes a personal advertising expert, as well as whitelists with geos and verticals.
- $3,000 — recommended for antivirus, finance, crypto, gambling, betting, and dating. In addition to the previous tariff benefits, this includes full campaign support, API access, free creatives, and a 5% deposit bonus.
- $10,000 — same recommendations. This package includes a personal advertising expert, turnkey campaigns, free creatives within 1.5 hours, whitelists by geos and niches, postback assistance, priority moderation, daily campaign checks, weekly calls on performance results, API access, and a 5% deposit bonus.
Additionally, you can deposit any other amount, with higher deposits offering more privileges.
Payment methods include credit card, bank transfer, Capitalist, or cryptocurrency. To pay for the desired tariff, click on “Add funds.”
To navigate to other sections of the personal account, click on the list icon in the top left corner of the screen to open the navigation menu. The menu includes the following sections:
- Campaigns
- Reporting
- Billing History
- Tracking
- Insights
- FAQ
- Bonuses
- Settings
- Profile
In the same menu, there is also a “Log out” button for logging out of the account.
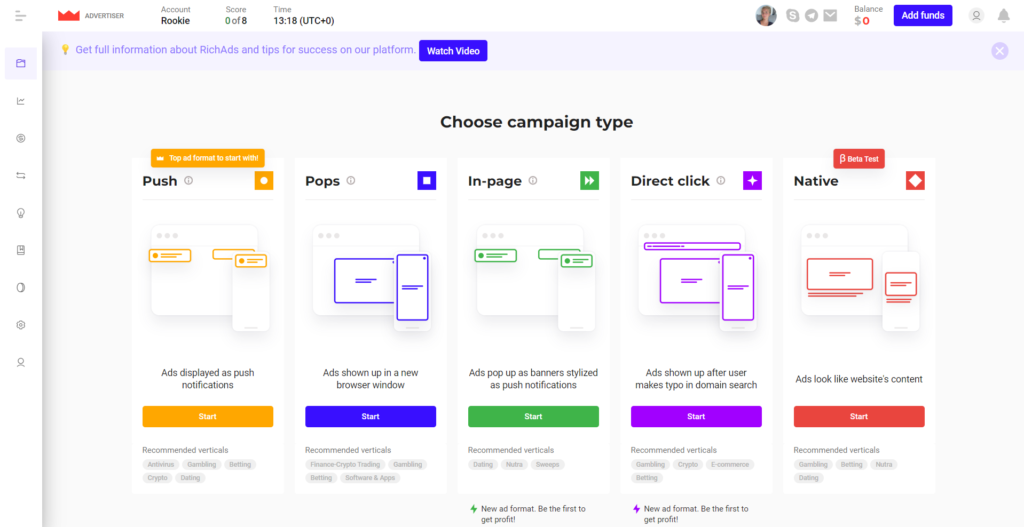
Campaigns
In the “Campaigns” section, you can view campaign statistics for a specific period. Clicking on “Columns” allows you to customize which metrics are displayed. Additionally, you can filter campaigns by status, format, geo, and optimization strategy.
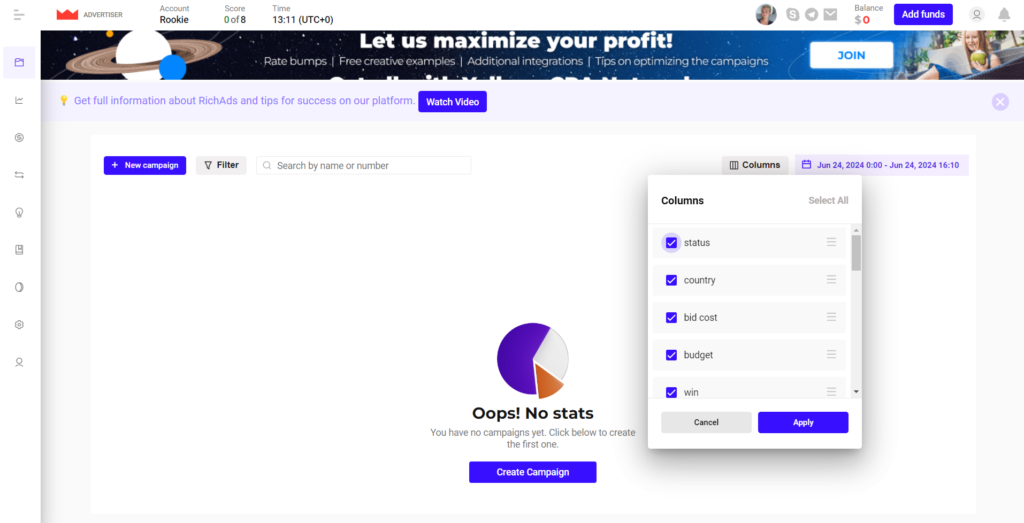
Here you can also create a new campaign:
- Click on “New campaign”.
- Choose the type of campaign: Push, Pops, In-Page, Direct click, Native.
- Click “Start”.
For each type of campaign, there are recommendations for choosing verticals, which are located below the “Start” button.
Reports
In this section, you can find reports on your campaigns. To create a new report, click on “New Report” or “Create Report”.
In the report creation window, you can:
- Select a time period.
- Add filters, such as by campaign ID or language.
- Exclude metrics that are not of interest.
- Choose up to three metrics to display separately in the report.
Once everything is set up, click “Create Report” to generate and view the report.

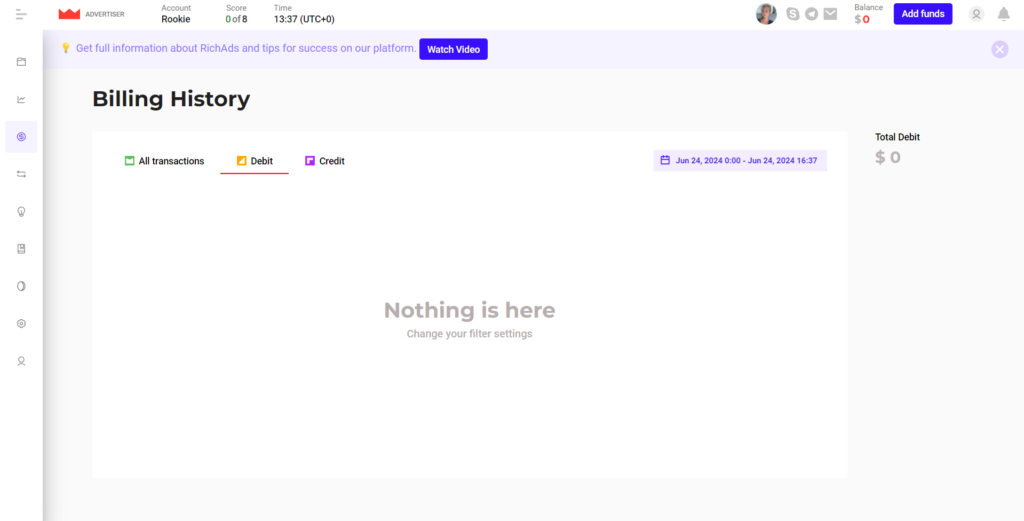
Billing History
Here, you can view the invoice history for the selected period.
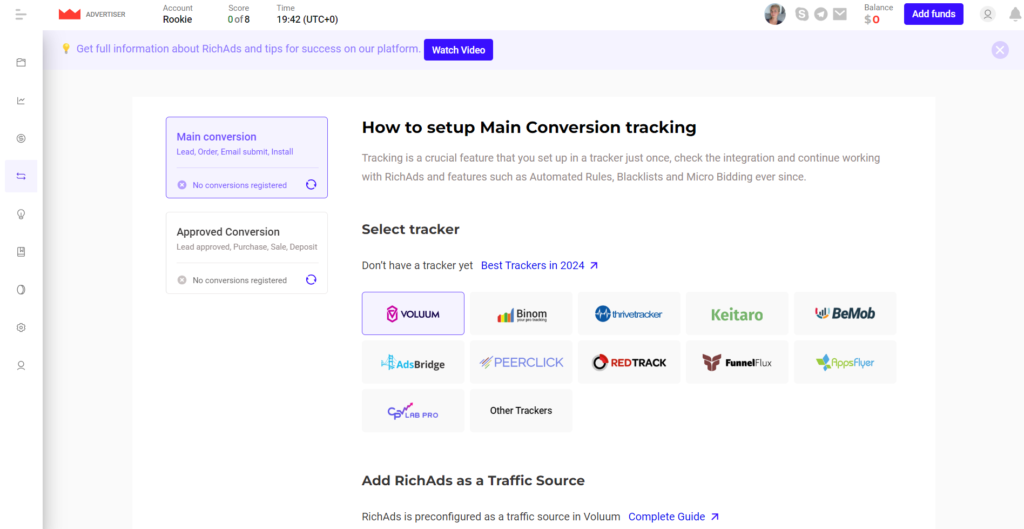
Tracking
In this section, you can set up a tracker by clicking “Set up tracker”. Then, in the opened tab, you need to choose a tracker from the following options:
- Voluum;
- Binom;
- Thrivetracker;
- Keitaro;
- BeMob;
- AdsBridge;
- Peerclick;
- RedTrack;
- FunnelFlux;
- AppsFlyer;
- CPV Lab Pro;
For each tracker listed on the page, there are integration instructions available. You can also use other trackers, for which RichAds has provided instructions as well.
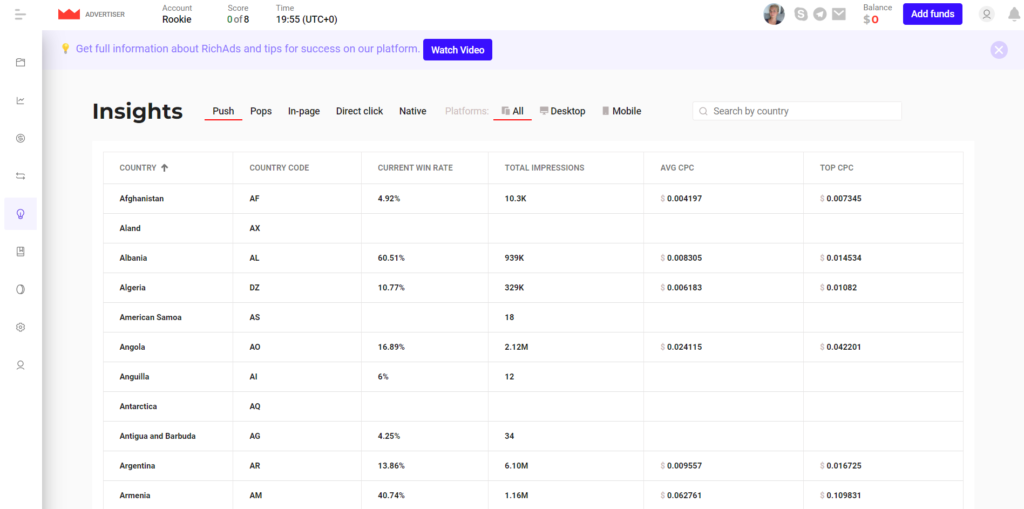
Insights
Here are insights from the advertising network regarding geos, advertising formats, and devices. You can view the following metrics:
- Win rate
- Impressions
- AVG CPC
- TOP CPC
If you need insights for a specific country, you can enter the country name in the search bar.
Settings
In the settings section, you can change your account password, obtain your API key, and block non-converting or expensive traffic sources.
The global block list operates at the account level — it automatically applies to all current and future campaigns after saving in the settings page. This list cannot be edited on the Optimizer or Edit Campaign pages. Editing or clearing the global block list is only possible in the Settings section.
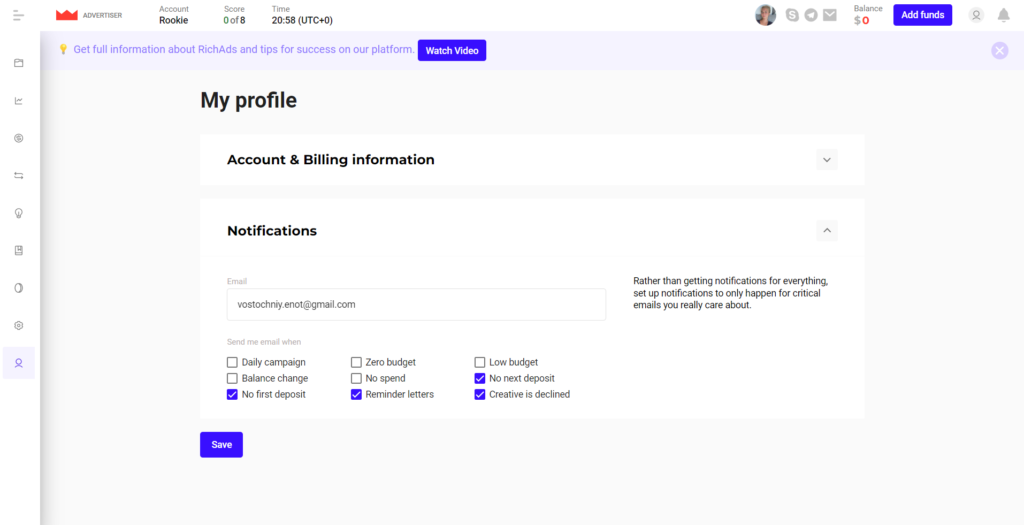
Profile
Here, besides editing contact details, you can also configure email notifications and choose the information that matters to you, such as:
- Daily campaign progress updates
- Balance changes
- Zero budget
- First deposit not made
- Creative rejected
The key is to remember to click ‘Save’.
How to start making money with RichAds
To start earning with RichAds, you need to:
- Find a suitable offer.
- Register on the official website of the advertising network.
- Select a tariff and pay for the service.
- Choose an ad format and create a campaign.
- Connect a tracker.
- Start running ads.
Ready! Now it’s just about monitoring and adjusting the campaign based on the results. By the way, another option to drive traffic from RichAds to is BETANDYOU Partners’ betting offers, so check out our review of it.
How to top up your account in the ad network
You can top up your RichAds account using:
- Credit/debit cards
- Bank transfer
- Capitalist
- Cryptocurrency
The minimum deposit amount is $150.
Reviews about RichAds
There are plenty of user reviews online. If you have worked with or currently work with RichAds, please share your reviews in the comments below to help colleagues make informed decisions.
Conclusion
RichAds can be a convenient solution for purchasing traffic worldwide. The company offers various advertising formats and is suitable for campaigns across almost any vertical, from nutra and antivirus to crypto and gambling.
You can try out this advertising network for yourself by registering on the official RichAds website today.

Dmitriy got a vast knowledge in affiliate marketing working as an affiliate for 6 years. He also worked an affiliate manager in the WebVork network.
After that, he started to write articles and guides for various affiliate marketing blogs, eventually becoming a head of several blogs: CPA Mafia, CyberAff, ProTraffic, AffTimes, CPA Monstro, and Affiliate Valley.
Now, he has his own blog CPA.LIVE and the ADDSET forum, also performing as a guest expert for AffDays and Greedy Affiliate.

Ratmir started his copywriting career back in 2016. He is now editor-in-chief with an MA with Honors in Linguistics.
His primary expertise is in affiliate marketing, EdTech, education, IT, and sports.
Ratmir specializes in content marketing, content management, proofreading, and translation.